How to Use Chroma Key in Alight Motion
How to Use Chroma Key in Alight Motion? popularly known as green screening—is no longer a technique reserved for Hollywood studios or heavy desktop software. With advanced mobile motion graphics apps like Alight Motion, creators can seamlessly swap backgrounds, composite complex animations, and create stunning visual effects directly from their smartphones.
However, there is a massive difference between a basic background removal and a pro-level composite. A bad key leaves behind pixelated edges, neon green outlines, and a distinct “fake” look.
If you want to move past the amateur look, this comprehensive guide will show you exactly how to use chroma key in Alight Motion like a pro, complete with hidden workflows to clean up your edges and blend your subjects flawlessly.
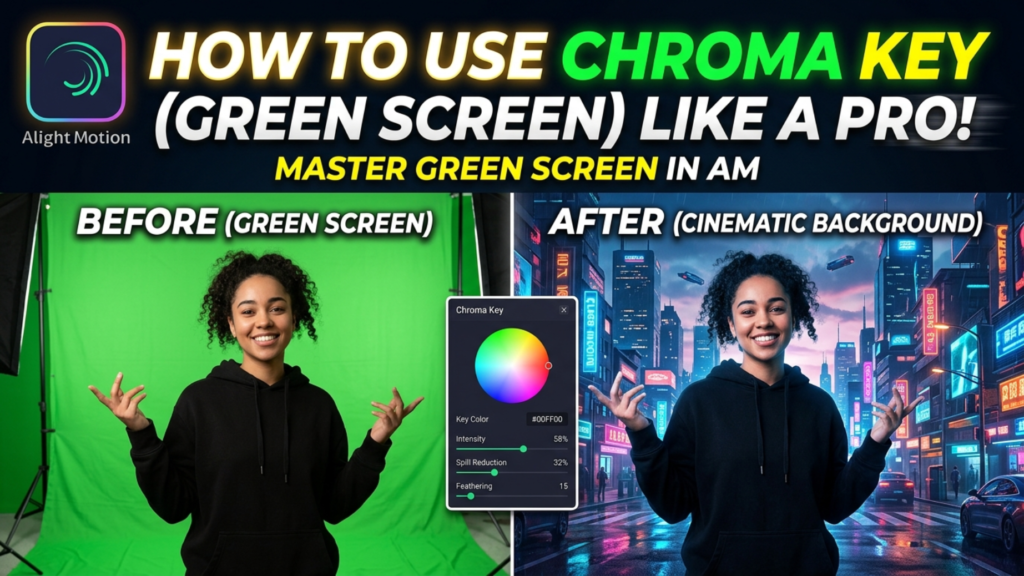
How to Use Chroma Key in Alight Motion
Before tapping a single button inside Alight Motion, the success of your chroma key depends heavily on your footage. If you are shooting your own green screen footage, keep these three rules in mind:
- Uniform Lighting: Shadows are the enemy of a clean key. Ensure your green screen is lit evenly across the entire frame.
- Distance is Key: Keep your subject at least 3–5 feet away from the green screen. This minimizes color spill—the green light bouncing off the wall and onto your subject’s clothing or skin.
- Avoid Motion Blur: High shutter speeds keep edges sharp, making it significantly easier for the software to separate pixels.
Step-by-Step: How to Apply Chroma Key in Alight Motion
Let’s break down the foundational workflow required to pull a clean background key.
Step 1: Set Up Your Project Timeline
Open Alight Motion, create a new project matching your video’s aspect ratio, and construct your layers:
- The Bottom Layer: This is your new background image or environment video.
- The Top Layer: Import your green screen video or graphic overlay directly above the background.
Step 2: Add the Chroma Key Effect
- Tap on your green screen layer to highlight it.
- Navigate to the Effects panel at the bottom right and tap Add Effect.
- Go to the Matte/Mask/Key category or use the search bar to find Chroma Key. Select it and tap Standard Settings.
Step 3: Target the Exact Green Hue
Alight Motion applies a default green color, but your footage likely has a slightly different hue due to lighting.
- Tap the Key Color box inside the effect settings.
- Select the Eyedropper tool.
- Drag the crosshairs over an area of the green screen closest to your subject’s face or hair.
Tweaking the Core Settings for a Seamless Edge
How to Use Chroma Key in Alight Motion? Once your key color is selected, you will notice the background disappears, but the edges likely look rough. To fix this, you must manipulate three primary sliders:
1. Threshold
The Threshold slider determines how aggressive the color removal is. Slowly slide it to the right until the entirety of the green background disappears completely. Be careful: pushing this value too high will cause your foreground subject to become semi-transparent or disappear entirely.
2. Feather
Feather controls the softness of the transition boundary between your subject and the background. Leave this too low, and your subject looks like a harsh paper cut-out. Increase the feather slightly (typically between 0.02 and 0.07) to mimic natural optical focal falloff.
3. Defringe (The Secret Weapon)
Toggle the Defringe switch to ON. Defringe forces Alight Motion to search the semi-transparent edge pixels and strip away leftover green hues without eroding your subject’s shape. It is crucial for handling complex edges like fine hair or clothing fabric.
3 Advanced Pro-Tips to Eliminate “Green Spill”
Even with defringing, difficult lighting can leave a faint green glow on your subject. Professional mobile editors use these extra stackable steps to eliminate edge remnants:
Use Matte Choker for Sharp Cutouts
If a stubborn line of green pixels tracks along your subject’s border, add the Matte Choker effect (found in the same Matte/Mask/Key menu) right after your Chroma Key. By adjusting the Choke slider, you can shrink or grow the matte boundary by fractions of a pixel, completely slicing off unwanted edge artifacts.
Neutralize Spills with the “Inner Glow” Trick
When green light wraps heavily around your subject’s skin or clothes, try this workaround:
- Add the Inner Glow effect from the Drawing & Edge category.
- Set the color to match the lighting color of your new background (e.g., warm orange if it’s a sunset background).
- Switch the blending mode to Normal and lower the radius so it only wraps tightly around the interior edge. This overrides the green spill with contextually accurate environment light!
Match the Color Grades
The fastest giveaway of a fake green screen edit is unmatched lighting. If your background is a dark, moody alley but your subject is bright and vibrantly lit, the illusion shatters.
- Select your foreground subject layer.
- Apply the Color Temperature or RGB Curves effect.
- Adjust the tones so your foreground matches the exact shadows, highlights, and color temperature of your replacement background.
Troubleshooting Common Alight Motion Keying Issues
| Problem | Root Cause | Quick Fix |
| “Holes” appearing inside the subject’s body | Subject is wearing a color too close to the key color, or the Threshold is too high. | Lower the Threshold slider. If that fails, duplicate the layer and use a shape mask to isolate the problem area. |
| Edges look pixelated or blocky | The source footage is low resolution, or the Feather value is at absolute zero. | Slightly increase the Feather slider to blend the rough edges into the background. |
| Laggy playback in timeline | Chroma keying and defringing require heavy processing power on mobile GPUs. | Group your composited layers together or use the timeline eye-icon to temporarily hide the background layer while syncing animations. |
Conclusion
Mastering how to use chroma key in Alight Motion boils down to balancing precision adjustments with secondary clean-up tricks. By matching your key color meticulously, leveraging the Defringe switch, and blending your final composite with strategic color grading, you can achieve visual parity with desktop editing software right fr