How to Do Transitions in Alight Motion (Complete Guide 2026)
If you want your videos to look smooth, cinematic, and professional, mastering how to do transitions in Alight Motion is one of the most important skills you can learn. Transitions are not just visual effects they control how your story flows from one clip to another. A strong transition keeps viewers engaged, while a bad one can instantly make your edit feel amateur.
In today’s fast-paced content world whether you’re creating TikTok edits, Instagram Reels, YouTube Shorts, or AMVs smooth transitions are what separate average edits from viral content. The good news is that Alight Motion gives you powerful tools like keyframes, graph editor, motion blur, and layer controls to create professional transitions directly from your mobile device.
What Are Transitions in Alight Motion?
A transition is a visual bridge between two clips. Instead of a hard cut where one clip abruptly switches to another, transitions blend them using motion, opacity, blur, or scaling.
In Alight Motion, transitions are usually created manually rather than relying on presets. This means you use:
- Keyframes to control movement
- Move & Transform for position, scale, and rotation
- Graph editor for smooth motion (easing)
- Motion blur for realism
- Effects like blur, glow, shake, and brightness
This manual workflow is what makes Alight Motion comparable (in concept) to professional tools like Adobe After Effects, even though it’s mobile-based.
Why Transitions Matter in Video Editing
Transitions are not just for style—they directly impact performance and viewer retention. When used properly, they:
- Keep viewers engaged and reduce drop-off
- Make your edits look high-quality and professional
- Help sync visuals with music beats
- Improve storytelling flow
- Add cinematic depth and motion
This is why almost every viral edit uses smooth and well-timed transitions.
Types of Transitions in Alight Motion
Smooth Transitions
Smooth transitions rely heavily on the graph editor in Alight Motion. Instead of linear movement, they use easing curves (Ease In / Ease Out) to create natural motion. These are widely used in cinematic edits and aesthetic videos.
Shake Transitions
Shake transitions are fast and energetic. They use rapid movement or effects like oscillation to create impact. You’ll often see them in gaming edits, hype edits, and beat drops.
Zoom Transitions
Zoom transitions use scaling to move in or out between clips. They are perfect for travel edits, vlogs, and dramatic storytelling scenes.
Fade Transitions
Fade transitions use opacity keyframes to smoothly blend clips. They are simple but effective for emotional scenes or time transitions.
Blur & Motion Transitions
These transitions combine fast movement with blur effects to create a realistic camera feel. Motion blur is essential here.
Custom Transitions
Custom transitions are built manually using multiple effects like rotation, masking, layering, and motion blur. These give your edit a unique style.
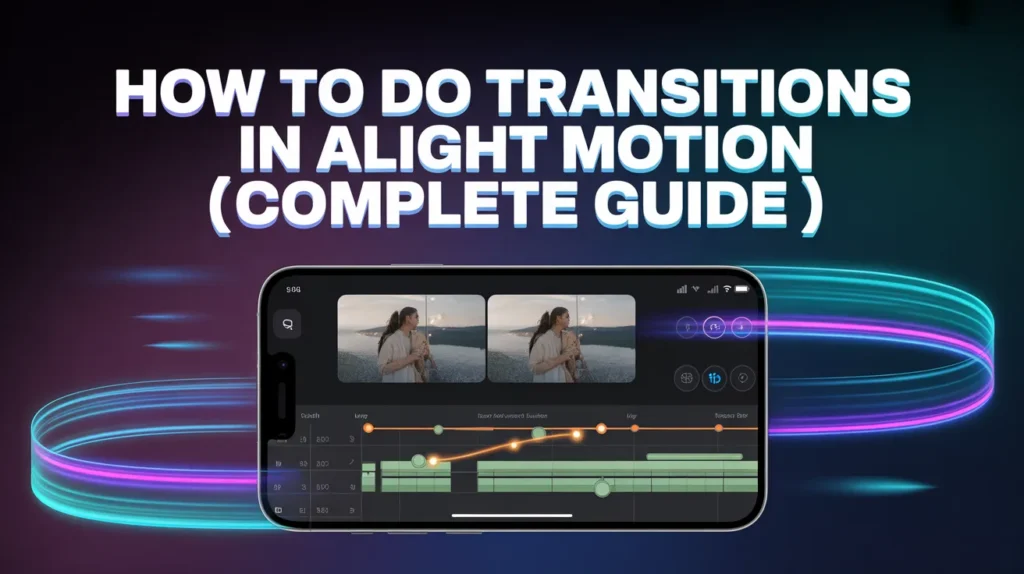
How to Do Transitions in Alight Motion (Step-by-Step Guide)

- To start, open Alight Motion and create a new project. Set your resolution and choose 30fps or 60fps (60fps is recommended for smoother transitions).
- Import your clips and place them next to each other on the timeline. Make sure there are no gaps between clips, as this can break the transition flow.
- Now select the first clip and go to Move & Transform. Add a keyframe at the end of the clip. Move slightly backward on the timeline and adjust position, scale, or rotation. For example, you can slide the clip to the left or zoom it in.
- Next, select the second clip and do the opposite movement at the beginning. If Clip 1 moves left, Clip 2 should enter from the right. This creates a seamless connection.
- After setting keyframes, open the graph editor. This is where most beginners struggle. Apply Ease Out to the first clip and Ease In to the second clip. Adjust the curves to make motion smooth and natural.
- Now add motion blur to both clips. This step is extremely important because it removes sharp edges during fast movement and makes the transition look cinematic.
- Preview your transition, adjust timing if needed, and once satisfied, export your video in high quality.
Advanced Techniques for Professional Transitions
Once you understand the basics, you can unlock advanced techniques to make your transitions stand out.
Graph Editor Mastery
The graph editor controls speed and motion flow. Learning how to adjust curves properly is the biggest step toward professional editing.
Layer Parenting & Null Objects
Using parenting and null objects allows multiple layers to move together. This makes complex transitions easier and more controlled.
Camera Movement Simulation
By moving layers at different speeds, you can create depth and parallax effects. This gives your edit a 3D-like cinematic feel.
Combining Effects
Professional editors rarely use a single effect. They combine motion blur, glow, brightness flash, and color grading to create powerful transitions.
Beat Sync Transitions
Matching transitions with music beats makes your video more engaging. This is widely used in TikTok and Instagram edits.
Common Mistakes to Avoid
- Many beginners make avoidable mistakes that ruin their transitions.
- Using too many effects is a major issue. Overloaded transitions look messy instead of professional. Another common mistake is ignoring the graph editor, which results in stiff and robotic motion.
- Low FPS settings can make transitions look laggy, especially fast ones. Also, poor timing between clips can break the flow completely.
Tips for Better Transitions
- To improve your transitions in Alight Motion, always focus on smoothness and consistency.
- Keep movement direction aligned between clips. If one clip moves left, the next should follow the same flow.
- Use motion blur carefully it enhances quality but too much can look unnatural. Try syncing transitions with music beats for better impact.
- Most importantly, keep practicing. Professional-looking transitions come from understanding motion, not just applying effects.
Key Features of Transitions in Alight Motion
- Keyframe-based animation for full control
- Graph editor for smooth motion curves
- Motion blur for realistic transitions
- Multiple styles (zoom, shake, fade, custom)
- Layer blending and visual effects
- High FPS support for smooth playback
- Custom transition creation without presets
Pros and Cons of Using Transitions in Alight Motion
Pros
- Full creative control using keyframes and graphs
- Professional-quality transitions on mobile
- No need for heavy software like Adobe After Effects
- Ideal for social media content creation
- Highly customizable editing workflow
Cons
- Learning curve for beginners
- Can lag on low-end devices
- Time-consuming compared to presets
- Requires practice for smooth results
- Overusing effects can reduce quality
Basic vs Advanced Transitions
| Feature | Basic Transitions | Advanced Transitions |
| Creation Method | Presets | Keyframes + Graph Editor |
| Control Level | Limited | Full Control |
| Smoothness | Average | Very Smooth |
| Time Required | Quick | Time-consuming |
| Customization | Low | High |
| Output Quality | Medium | Professional |
Conclusion
Learning how to do transitions in Alight Motion is one of the most valuable skills in mobile video editing. It’s not just about adding effects it’s about understanding motion, timing, and flow.Once you master keyframes, graph editor, and motion blur, you can create smooth, cinematic, and professional transitions directly from your phone. With consistent practice, your edits will stand out on platforms like TikTok, Instagram Reels, and YouTube Shorts.