How to Do Velocity Editing in Alight Motion
Velocity editing has completely taken over social media platforms like TikTok, Instagram Reels, and YouTube Shorts. From smooth anime edits to hard-hitting gaming montages, the ability to selectively speed up and slow down footage to sync with a music track creates an incredibly engaging visual rhythm.
While professional desktop software like After Effects used to be mandatory for this effect, mobile editors can achieve identical results. This comprehensive guide details how to do velocity editing in Alight Motion using keyframes, speed adjustments, and custom graphs.
What is Velocity Editing?
Before diving into the technical steps, it helps to understand what is happening behind the scenes. Velocity editing (often called time remapping) is the process of changing the playback speed of a video clip dynamically over time.
Instead of cutting a clip and setting one piece to $2\times$ speed and another to $0.5\times$ speed—which results in jarring, choppy transitions—velocity editing uses easing curves to smoothly transition between fast motion and slow motion. When executed correctly, the video seems to “rush” into an action and then dramatically drop into smooth slow motion right on the beat of the music.

Prerequisites: Preparing Your Material
To achieve a flawless velocity edit, your raw footage needs to meet specific criteria:
- High Framerate: Always try to use footage shot at 60 frames per second (fps), 120 fps, or higher. When you slow a video down to $0.25\times$ speed, a 30 fps video drops to less than 8 fps, creating massive lag. A 60 fps clip slowed down to $0.5\times$ remains a perfectly smooth 30 fps.
- The Right Audio Track: Look for music with a distinct, heavy bass drop or highly rhythmic beats. Your velocity shifts will align directly with these audio markers.
Step-by-Step: Creating a Velocity Edit in Alight Motion
Alight Motion handles velocity adjustments via its Speed Control menu using a combination of splitting and graph easing. Follow this structured workflow to create your first clean edit.
Step 1: Import Your Assets and Mark the Beats
- Open Alight Motion and start a new project matching your footage aspect ratio (usually 9:16 for mobile platforms).
- Tap the + icon, select Media, and import both your video clip and your audio track.
- Play through your audio track. Every time you hear a prominent beat where you want the speed to shift, tap the timestamp on your timeline. This leaves a red marker that serves as your visual guide.
Step 2: Slice Your Video into Sections
To manipulate the velocity curves cleanly, you need to isolate the exact moments where transitions occur.
- Align your timeline playhead with your first red beat marker.
- Select your video layer.
- Use the Split tool (the center icon that cuts the clip in half without deleting anything) to slice the video directly on the beat.
- Repeat this for every beat marker across the timeline. You will be left with a series of smaller consecutive clips.
Step 3: Apply the Speed Shifts
Now you will establish the contrast between high speed and slow motion. A classic velocity pattern is Fast $\rightarrow$ Slow $\rightarrow$ Fast.
- Select the clip sitting right before a beat drop.
- Tap the Speed icon (shaped like a speedometer dashboard).
- Drag the slider to accelerate this clip (e.g., $1.5\times$ to $2.5\times$). This builds tension right before the beat hits.
- Select the clip directly after the beat drop. Go back into the Speed menu and pull the slider down to slow it down (e.g., $0.3\times$ to $0.5\times$).
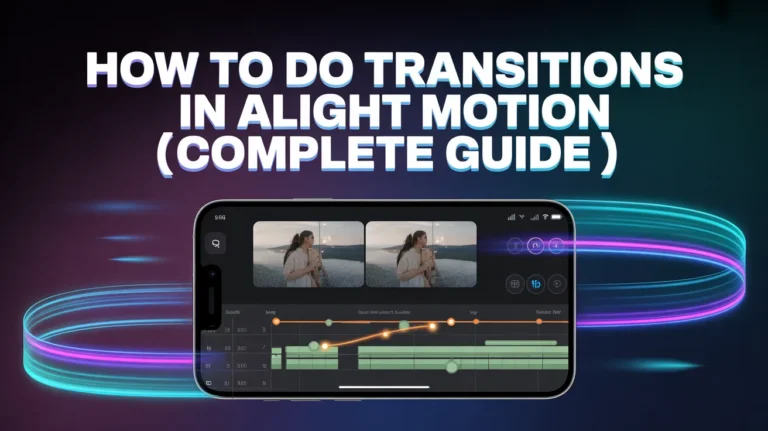
Step 4: Mastering the Easing Graph for Ultra-Smooth Transitions
If you play the timeline now, the abrupt speed jumps will feel incredibly blocky. To fix this, you must adjust the keyframe interpolation curves.
- Look to the left side of your timeline screen and tap the Graph icon (located directly beneath the keyframe diamond icon).
- To create a smooth acceleration that snaps quickly into the slow-motion section, you want an exponential curve shape.
- Adjust the handles so the curve starts relatively flat, curves sharply upward in the middle, and flattens out again at the top.
Pro-Tip on Graph Tuning: For a sharp, aggressive velocity pop, pull the right handle all the way down and the left handle tightly toward the center. This forces the clip to maintain its high speed until the absolute last millisecond before dropping instantly into slow motion.
Enhancing Your Velocity Edit with Advanced Effects
A raw velocity edit looks great, but adding professional finishing touches will make your video stand out on algorithms.
1. Enable Motion Blur
When objects move quickly in real life, they blur. Digital speedups lack this, making them look artificial.
- Select your accelerated video clip.
- Go to Effects $\rightarrow$ Add Effect.
- Search for Motion Blur and apply it. Turn the intensity up to around 1.20 to 1.50. This blends the frames together beautifully during high-velocity moments.
2. Add Flash Transitions on the Beat Drop
To emphasize the sudden drop into slow motion, add a quick exposure flash right on the split marker.
- Add an Adjustment Layer or a plain white rectangle shape over the exact frame where the clip splits.
- Cut the shape so it lasts only about 5 to 10 frames long.
- Go to Effects $\rightarrow$ Exposure/Gamma.
- Set a keyframe at the very beginning of the white shape with Exposure at $+2.0$, and another keyframe at the very end of the shape with Exposure at $0.0$.
- Change the blending mode to Overlay or Screen.
Troubleshooting Common Alight Motion Velocity Issues
| Issue | Root Cause | Quick Fix |
| Video is extremely choppy during slow-mo | Raw video was recorded at 30 fps or lower. | Export the clip from your device’s native editor using an “optical flow” or “slow-mo” feature first, or turn on frame interpolation if available. |
| Audio gets distorted or high-pitched | The audio track is scaling along with the video layer cuts. | Ensure your music track is kept on a completely separate audio layer and never split or speed-adjusted alongside the video slices. |
| Laggy playback in the preview window | Alight Motion is rendering high-resolution frames in real-time. | Go to your project settings and temporarily lower the preview resolution to 360p or 540p while editing. It will still export in full quality. |
Final Export Settings for Social Media
Once you are satisfied with the speed transitions, it is time to export your project. Tap the export icon in the top right corner and use these optimal settings for crisp social media uploads:
- Export Format: Video (MP4)
- Resolution: 1080p FHD (Avoid 4K unless your raw footage is natively 4K, as it unnecessarily blows up mobile file sizes).
- Frame Rate: 60 fps (Crucial for maintaining the fidelity of your slow-motion curves).
- Bitrate: Set the slider to High to avoid blocky compression artifacts during high-speed motion segments.