Advanced Keyframe Techniques in Alight Motion Complete Guide
Advanced Keyframe Techniques in Alight Motion bring your ideas to life with smooth, dynamic animation. They act like roadmaps, telling your animation software exactly where you want objects to be at specific points in time. By strategically placing keyframes, you control movement, create transitions, and breathe life into your creations.
This article explores the exciting world of keyframe animation, offering a toolbox of solutions for all skill levels. We’ll cover a variety of keyframe approaches, so feel free to join in if you’re a newbie eager to get started or an experienced animator trying to optimise your process.
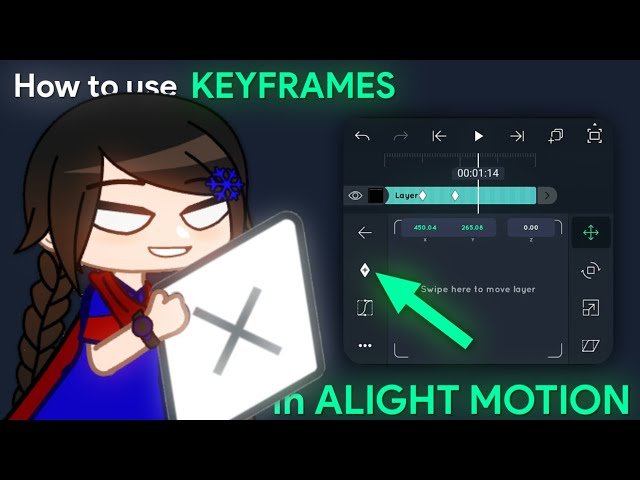
Advanced Keyframe Techniques in Alight Motion
✔️ Easing Functions
Easing functions allow you to control the speed and smoothness of an animation between keyframes. Alight Motion provides a range of easing options, such as linear, ease-in, ease-out, and custom easing curves. Experimenting with different easing functions can add depth and realism to your animations.
✔️ Keyframe Interpolation
Keyframe interpolation determines how the property values change between keyframes. Alight Motion offers interpolation options like linear, bezier, and auto bezier. Bezier interpolation provides more control over the animation curve by allowing you to adjust the influence handles of the keyframes.
✔️ Time Remapping
Time remapping is a powerful feature that enables you to manipulate the timing and speed of your video. By adding keyframes to the time remapping property, you can create slow-motion or fast-forward effects, freeze frames, or even reverse playback.
Tips for Using Advanced Keyframe Techniques in Alight Motion
Now that we’ve covered the basics, let’s explore some tips to help you make the most of keyframes in Alight Motion.
✔️ Planning Your Animation
Before diving into keyframe animation, it’s essential to plan your animation sequence. Visualize how you want your video to flow and sketch out a rough storyboard. This will help you determine the keyframes needed and the timing of each animation element.
✔️ Using Multiple Keyframes
To create smooth and natural-looking animations, use multiple keyframes to define gradual changes in properties. By adding intermediate keyframes between the start and end points, you can achieve more realistic motion.
✔️ Fine-tuning Keyframe Properties
Don’t be afraid to experiment with different values and properties for each keyframe. Adjusting properties like position, scale, and rotation incrementally can add depth and dimension to your animations.
How to Create a Video Using Advanced Keyframe Techniques in Alight Motion?
Now let’s put our knowledge into action and create a video using keyframes in Alight Motion. Follow these steps to bring your animations to life:
- First, start as you import the media files (images, videos, or audio) you’ll be using in your video project.
- Secondly, create a new project and set up the project settings, including the resolution, frame rate, and duration.
- After that, select the element you want to animate, navigate to the keyframe timeline, and add keyframes at the desired positions.
- Meanwhile, modify the properties of the element at different keyframes to achieve the desired animation effect.
- After that, Experiment with position, scale, rotation, and other properties to create engaging visuals.
- Finally, once you’re satisfied with your animation, preview the video to ensure it looks as expected. Then, export the video in your preferred format and quality settings.
FAQs:
How to do keyframes on Alight Motion?
To edit keyframes, first, open Alight Motion and create a new project. secondly, import media and add it to the timeline. After that, edit media by dragging keyframes. Preview changes, and finally export.
What is keyframe animation technique?
Keyframe animation is a technique where the animator specifies the start and end positions of an object, and the computer calculates the intermediate positions.
What are the 4 different types of keyframes?
The 4 different types of keyframes are: start keyframes, end keyframes, in-between keyframes, and hold keyframes.
What is the process of creation and removal of keyframes in Alight Motion?
To create a keyframe in Alight Motion, tap the keyframe icon on the timeline. To remove a keyframe, tap and hold the keyframe until it disappears.
Conclusion:
Mastering keyframe techniques in Alight Motion opens up a world of creative possibilities for your video editing projects. By understanding basic and advanced techniques, utilizing effective tips, and experimenting with keyframes, you can elevate your videos to new heights. So start exploring, unleash your creativity, and bring your ideas to life with Alight Motion’s powerful keyframe capabilities.