How to Create 3D Text Effects in Alight Motion Without Plugins
Alight Motion has revolutionized mobile motion design, offering desktop-grade animation tools right on your smartphone or tablet. While many creators assume that striking, deep 3D typography requires expensive third-party plugins or desktop software like After Effects, the truth is simpler: you can create stunning 3D text using Alight Motion’s native, built-in tools.
By leveraging the power of layer duplication, 3D rotation, and strategic shadow play, you can build professional-grade 3D titles entirely from scratch. This comprehensive, step-by-step guide will walk you through the exact techniques to master 3D text in Alight Motion without spending a dime on plugins.
The Core Concept: How “Fake” 3D Works in 2D Space
How to Create 3D Text Effects in Alight Motion Without Plugins
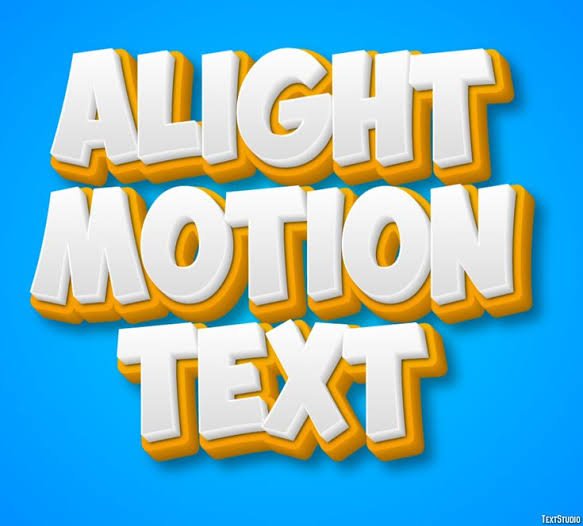
True 3D software renders objects using polygons along an X, Y, and Z-axis. Because Alight Motion is primarily a 2D vector animation app, we use a classic motion graphics technique called extrusion stacking.
By duplicating a text layer multiple times and shifting each duplicate slightly along the X and Y coordinates while darkening the lower layers, we create a convincing illusion of depth (extrusion). Combined with Alight Motion’s native 3D Rotate effect, we can make this extruded text turn and tilt realistically in virtual space.
Step-by-Step Guide to Creating 3D Text in Alight Motion
Follow these steps to create your first clean, professional 3D text block.
Step 1: Set Up Your Canvas and Base Text
First, we need a clean slate and a strong, bold font. Thin or script fonts do not extrude well and tend to look messy when stacked.
- Open Alight Motion and tap the “+” (Plus) icon to start a new project.
- Select your desired aspect ratio (e.g., 16:9 for YouTube or 9:16 for TikTok/Reels) and set the resolution to 1080p or 4K with a black background. Tap Create Project.
- Tap the “+” button in the bottom right, select Text, and type your word (e.g., “3D”).
- Change the font to a thick, heavy sans-serif typeface (such as Montserrat Extra Bold, Impact, or Roboto Black).
- Increase the font size so it fills the center of the screen, color it a bright shade (like vibrant orange or cyan), and tap the checkmark to save.
Step 2: Apply the 3D Rotate Effect
Before we create the depth, we want to angle our text so the 3D sides will actually be visible to the viewer.
- Select your text layer on the timeline.
- Tap Effects > Add Effect.
- Navigate to the 3D category and select 3D Rotate (standard settings).
- Adjust the Orientation (Y-Axis) to around 15° to 25° and the Axis (X-Axis) to around -15°. This tilts the text slightly, creating the perfect angle to showcase depth.
Step 3: Build the Extrusion Layer (The 3D Depth)
Now, we will create the actual 3D “block” underneath the face of the text.
- Duplicate your text layer by selecting it, tapping the Layer Options icon (two overlapping squares with a plus sign next to the trash bin), and selecting Duplicate Layer.
- Select the bottom layer of the two. This will act as your first extrusion step.
- Tap Effects and open the 3D Rotate settings on this duplicate.
- Go to the Move & Transform tool. Tap the Move icon and nudge this bottom layer 1 pixel down and 1 pixel to the left (or right, depending on which way you want the shadow to fall).
- Go to Color & Fill and make this layer slightly darker than your front text layer.
- Repeat this process: Duplicate the lower layer again, move the new bottom layer another pixel down and left, and make it slightly darker.
- Do this 5 to 10 times.
Pro Tip: To save system memory and keep your timeline neat, you can group these duplicate layers. Select all the background/extrusion layers and tap the Group icon at the top of the screen.
Step 4: Add Realistic Lighting and Shadows
A 3D object isn’t convincing without shadows. To make your text pop off the screen, we need to add ambient occlusion (the dark shadows where surfaces meet).
- Select your grouped extrusion layer or the very bottom text layer in your stack.
- Tap Effects > Add Effect and search for Drop Shadow (found under the Drawing & Edge or Shadow categories).
- Set the shadow color to black, lower the opacity to around 40% to 50%, and increase the blur slightly to soften the edges.
- Adjust the angle of the shadow to match the direction of your text’s tilt.
How to Create 3D Text Effects in Alight Motion Without Plugins
Static 3D is great, but animating it makes it look incredibly high-end. To animate the entire 3D block as one unit without messing up your alignment, we must use a Null Layer or Grouping.
Method: Grouping for Clean Animation
- Select all of your text layers (the front face layer and all the extrusion layers/groups).
- Tap the Group icon at the very top of the screen to merge them into a single master folder (Group 1).
- Now, select Group 1 and tap Move & Transform.
- Go to the Rotate or 3D Rotate tab and add a keyframe at the start of your timeline.
- Move down the timeline, rotate the group slightly, and add another keyframe.
- Alight Motion will now animate the entire 3D block smoothly, keeping the front face and the extrusion perfectly synced.
On-Page SEO Checklist for Creators
If you are publishing this tutorial on a blog or video description, make sure to optimize it with these SEO essentials:
- Primary Keyword: How to Create 3D Text Effects in Alight Motion Without Plugins (Use this in your H1 title, first paragraph, and alt text of your images).
- Secondary Keywords: Alight Motion 3D text tutorial, mobile motion graphics, Alight Motion extrusion, 3D text on phone, Alight Motion tips.
- Meta Description: Learn how to create stunning, professional-grade 3D text effects in Alight Motion without using any plugins. Perfect step-by-step mobile animation guide.
- URL Slug:
/create-3d-text-alight-motion-without-plugins - Image Alt Text: Ensure any screenshots or GIFs of the process use descriptive, keyword-rich alt text (e.g., “Alight Motion 3D rotate settings panel”).
Summary of Key Settings
| Step | Action | Key Values / Settings |
| 1. Font Choice | Select bold sans-serif | Montserrat Black, Impact, bold weights |
| 2. 3D Angle | Apply 3D Rotate effect | Y-Axis: 15° to 25°, X-Axis: -15° |
| 3. Extrusion | Duplicate & Offset layers | Offset by 1px down/left per layer; darken color |
| 4. Grouping | Select all and Group | Animates the entire 3D object as one unit |